|
Garry Black Photography |
|
SOUTHERN
AFRICA PHOTO SAFARI |
|
Instructional Tips – Sand Dunes, Namibia |
|||
|
|
|||
|
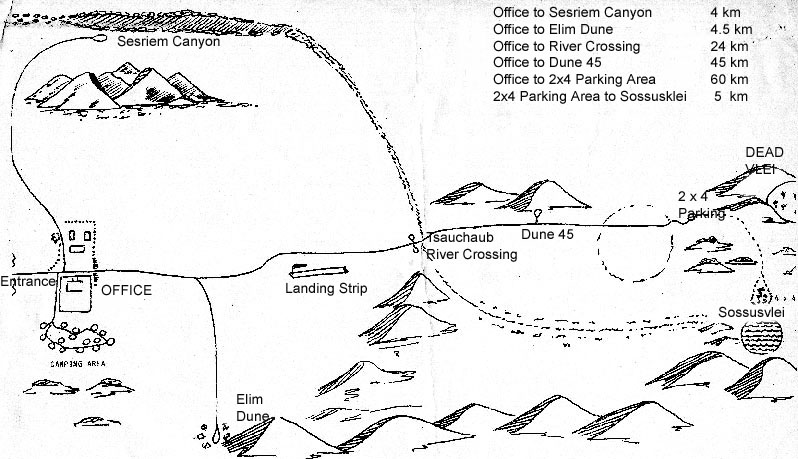
There are 3 distinct areas to the sand dunes. Here is a hand drawn map of the area from one of my previous trips. The first is the area where we will be staying, it’s just outside of the towering dunes. The landscape is one of gravel/sand with scrub brushes with an occasional tree. It's interesting but personally I don't find it all that photographic. We have to stay here, as there are no accommodations within the park. The park doesn't “officially” open until sunrise, but since "Little Kulala" has it's own private gated entrance we’ll be able to be at the dunes when the sun rises.
|
|||
|
|||
|
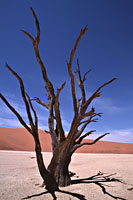
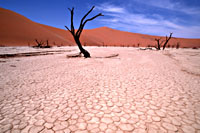
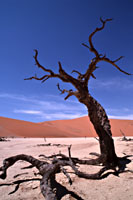
The last area is considered part of the dunes but it’s uniquely different. The area is called the Dead Vlei, vlei means a pan type area. It was once a forested area, now all that remains are the black petrified tree skeletons, on a bed of white sun cracked clay, which is surrounded like an amphitheater by the tower orange sand dunes. This is a good area to come to in the middle of the day, as shadows aren’t as important here as they are for the dunes themselves. |
|||
|
|||
|
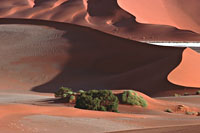
Now that is not to say that there isn’t any life in the desert. The following 2 pictures were taken in the area of the 2-wheel drive parking lot. There are a few green bushes and trees in the desert, they run along a sub terrain river. |
|||
|
|||
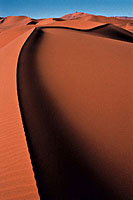
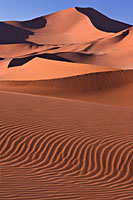
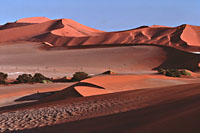
PHOTOGRAPHY IN THE DESERTIf you’ve read the suggested equipment list you’ll know that I’ve recommended Zip Loc bags and a Hurricane Blower. Both of these are essential for photography here. You will also need a tripod, if you study all the images on this page you will notice that they are all sharply in focus from the foreground to infinity. In order to achieve this, all of them were shot at an aperture of F22. The lenses that you will be using will range from wide-angle to long telephoto (200mm – 300mm). My preference for film here would be Velvia, as I want the
shadows to be very dark. In my
experience with Provia, I have
found that there is an extra stop of tonal range in the shadows. What this
means is that the shadow area of the picture really isn’t as black or dark as
it would be with Velvia. But this is a personal choice, so either film would
be fine. Keep in mind that the colour palette of Provia is not as saturated
(or exaggerated) as Velvia. For filters, a definite must is a polarizer! You may also want to use a Yellow/Blue Cokin#173 Polarizer for a different effect, but it isn’t really necessary – it’s up to you. Another optional filter is a Red Enhancing filter, this will make the sand appear very orange and almost pure red at sunset. I used a red enhancing filter for the 2 images that are on top of this page. Here is an example of this filter at sunset. |
|||
|
|
![]()
| Southern
Africa Workshop Website |