|
HOME | PHOTO GALLERY | WORKSHOPS | ASK GARRY! | BLOG | TIPS & TECHNIQUES |
|
How to Create a Digital Orton |
|
|
|
This technique was originally created by Michael
Orton using slide film to create the effect. Here's the basic
technique using film. You take 2 shoots of a scene (identical
compositions), the first would be sharply in focus (shot for maximum depth
of field) and deliberately overexposed by 2 stops. The second
shot will then be thrown completely out of focus (shot wide open) and
overexposed by 1 stop. Then the 2 pieces of film are placed
together in one mount, the resulting sandwich will be perfectly exposed
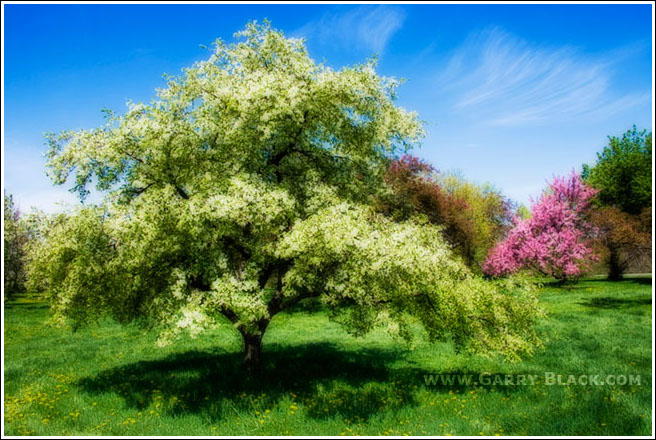
and have a soft painterly quality to it.
As
with most things in PhotoShop, there are several ways to achieve the
same or similar effect. Here
are 2 techniques to digitally create an "Orton" from any existing
digital image.
Method 1
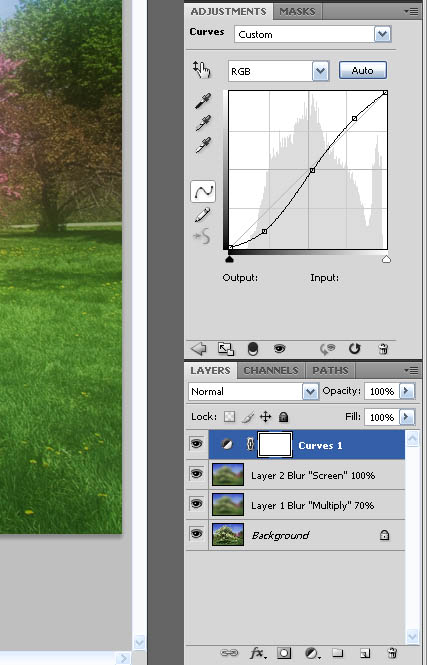
1. Make 2 copies of your
original image (Background) Hit (Ctrl+J) twice. Name them Layer 1 and
2.
2. Change blending mode of the top Layer
2 to "Screen", this gives the effect of an overexposed image.
3.
Change blending mode of Layer 1
to "Multiply"
4. Now blur
both Layer 1 and 2 (Filter>Blur>Gaussian Blur) in the dialog
box use a setting between 10 to 40 pixels. Try several settings for
different effects, the greater the radius the more painterly the effect. But it really depends
on your image and the effect you want to create.
5. Change the opacity of
Layer 1, in this example it is set to 70%.
6. You may want to make adjustments in Curves or Levels at
this point as well. This is usually a necessary step.
7. Flatten the Image and
Save.
|
|
|
|
Method 2
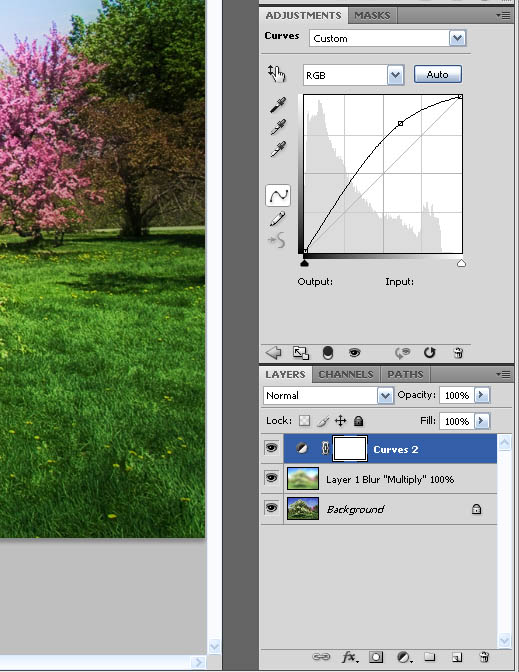
1. Make a copy of your original image (Background)... (Ctrl+J). Name it Layer 1 2. Adjust curves or levels of Layer 1 until the image looks as though it is 2 stops overexposed. 3. Now blur Layer 1 (Filter>Blur>Gaussian Blur) in the dialog box use a setting between 10 to 40 pixel. 4. Change blending mode of Layer 1 to "Multiple" at 100% opacity. 5. You may want to make adjustments in Curves or Levels at this point as well. This is usually a necessary step. 6. Flatten the Image and Save. |
|
|
|
External Links: Flickr Orton At the time of this posting 4000 members belong to this group Wikipedia Orton Photography A variation of Method 1 can be found here Orton Imagery a technique by Darwin Wiggett. |