 |
To repair this photo was quite simple; in fact it was the first photo that I worked with in Photoshop. |
|
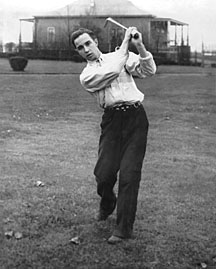
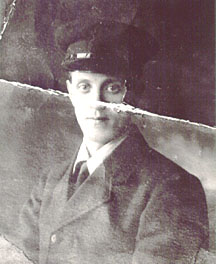
| ORIGINAL PHOTO | FINAL PHOTO |
|
| The first step was to increase the
contrast and the tonal range in the entire image. This
can been done several ways, in Photoshop there is always
several ways to achieve the same effect, when learning
Photoshop this can be very confusing. To increase the
contrast and the tonal range in this image I went to the
levels box and increased and decreased the input levels.
This brought the photo back to its original tones. Then came the real time consuming process of repairing the missing part of the photograph. A mistake that I made was that I had the photo scanned at a very low resolution 72dpi. I quickly learned that the better the scan was the easier it made the retouching. Using the rubber-stamping tool, I cloned parts of his face to replace the missing areas and did the same for the sleeve on his jacket. I didn't bother trying to fix the background because I was going to replace it, which is the next step. Using the lasso tool I made a selection (outline) of my grandfather. Then I made a copy of him on another layer, so now I had the background (original photo) and also just a picture of my grandfather on the other layer. I created a new layer and placed it between the background and him. Using the paint fill command I painted this new layer a light gray, then with a small paint brush I painted it even a lighter gray tone in the area where he is. Then using the gaussian blur filter I blended these paints into a soft gradation. This became the new background. Then I flattened the image; this merges all of the layers into one. The last step involves the colourization of the photo. I converted the image mode from gray scale to RGB. Then making selections of his jacket/hat, tie, face, eyes, hair/eyebrows, lips and the background and saving these as channels. Then for each one of these selections, using replace colour I added the colour that I thought was the most appropriate. |
||